Relief printing is the most ancient method of taking an impression from one object and putting it on to another. The earliest form of relief prints were found in China in the 7th Century. It was used to spread Buddhism.
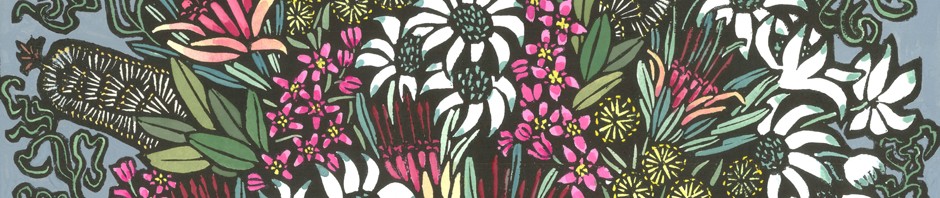
I choose to do my images with lino as I like the contact with the surface in each step of the process. The carving of the lino takes the initial image beyond the drawing and adds a further dimension to it for me. There is the excitement of ‘pulling’ the first print and the hand-colouring makes it come alive with colour.
- I transfer my drawing (in reverse) onto a piece of lino
- Using carving tools with various blades, I carve away the areas I don’t want to print. This forms a relief block, like a stamp.
- I then roll black ink over the carved lino block. The ink comes into contact with the raised areas of the lino.
- Paper is then placed over the inked lino and pressure is put onto the back of the paper by rubbing with a wooden spoon or through a printing press. This transfers the ink from the lino block onto the paper.
- When the print is dry I paint the areas that I have carved away to produce the final image.
- The first print I paint becomes my ‘artist proof’. I then print an edition of 20 prints, which I paint referring to the artist proof. This makes each print individual.
The prints are on 280gms ‘Magnani’ 100% rag, acid free paper. I print with Van Son rubber based printing ink and paint with Gouache.
Linoleum is a natural product made from linseed oil and wood flour.
 I use a Farley Proofing Press to print my editions
